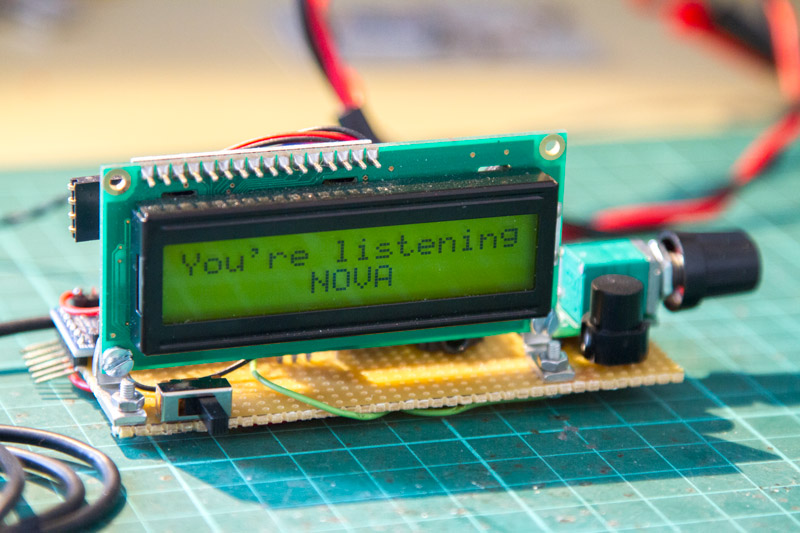
Again, a FM radio project based on Si4703 breakout board with Arduino, for your bench-work, bathroom … you can listen your programmed favorites radio station,…
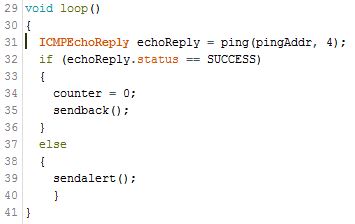
I’have finally found an excuse to use my Akeru SigFox board, with some lines on Arduino, two libraries, and a Ethernet shield, you can monitor…
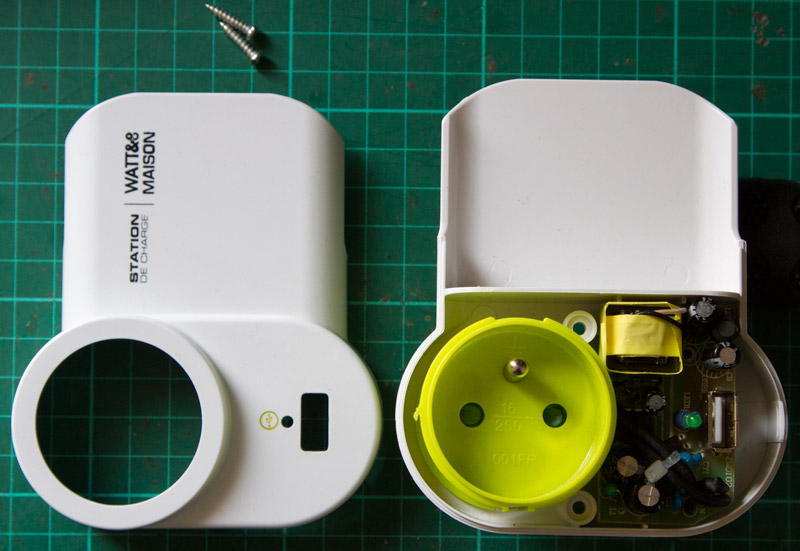
Article rédiger en Français, ce produit n’étant a ma connaissance vendu quand France. WATT&CO est une startup d’une dizaine de personnes, installée dans le Vaucluse….
Small prototype of combination between trackuino and DRA818V, Overview « Trackuino is intended for use by licensed radio amateurs. By operating on the standard APRS frequency,…
I have finally find a little bit of time to finish the build of my EasyIOT temp/humidity sensors, based on DHT22, each sensor send every…